Welcome to the Mixing Station Manual, your comprehensive guide to understanding and mastering the functions of your mixing station․ This manual provides detailed instructions, troubleshooting tips, and best practices to ensure optimal performance and safety․ Whether you’re setting up, operating, or maintaining your mixer, this resource will help you achieve professional results efficiently․ Explore the sections to unlock the full potential of your mixing station and enhance your mixing experience․
1․1 Purpose of the Manual
This manual serves as a comprehensive guide for understanding, installing, and operating your mixing station․ It provides detailed instructions for setup, configuration, and maintenance, ensuring optimal performance․ The manual also covers safety precautions, troubleshooting, and best practices for maximizing efficiency․ Designed for both beginners and experienced users, it offers clear, step-by-step explanations to help you master your mixing station’s capabilities․ Refer to this guide for addressing technical queries, resolving issues, and exploring advanced features to enhance your mixing experience․
1․2 Overview of Mixing Station Components
Your mixing station comprises essential components designed for efficient mixing and control․ Key elements include the mixer interface, which houses faders, knobs, and buttons for adjusting audio levels and effects․ The channel strip provides individual controls for each audio source, while the master section manages overall output․ Additional components like MIDI controllers and network modules enable remote operation and connectivity․ These parts work together to streamline your mixing process, ensuring precision and flexibility․ Understanding each component is vital for maximizing your mixing station’s performance․

Installation and Setup
Install your mixing station using the provided mounting brackets and screws․ Connect all cables securely and configure the software according to the manufacturer’s instructions for optimal performance․
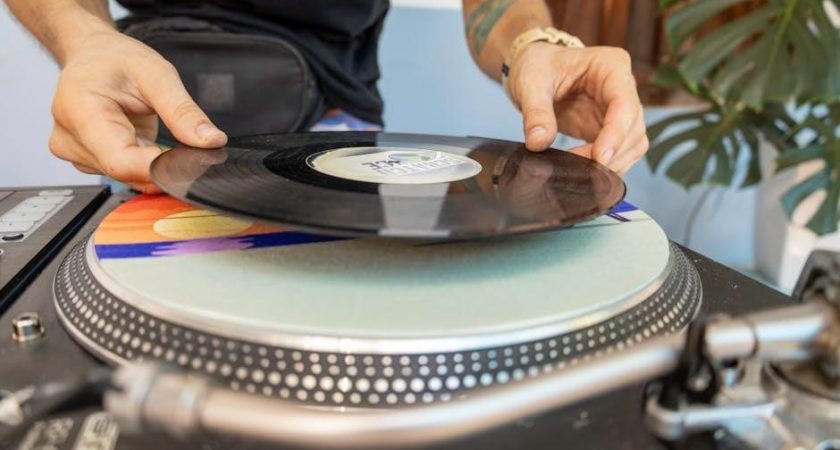
2․1 Physical Installation of the Mixing Station
Mount the mixing station using the factory-tested brackets and pre-drilled holes․ Secure it with pan head or wood screws, ensuring stability․ Place the unit on a level surface to prevent imbalance․ Connect all audio and power cables securely, following the manufacturer’s guidelines․ Ensure proper ventilation and avoid exposure to water․ For industrial models, refer to the manual for specific mounting instructions․ Double-check all connections before powering on to ensure safe and efficient operation․
2․2 Software Setup and Configuration
Open the Mixing Station app and follow the on-screen instructions to connect your mixer․ Ensure your device is compatible and meets the required firmware version․ Authorize the mixer within the app to establish communication․ For MIDI controllers, enable MIDI mode and sync with the mixing station․ Refer to the manufacturer’s manual for specific MIDI setup instructions․ Customize settings like channel labels and layers to suit your workflow․ Save your configuration to ensure consistency across sessions․ For network setup, consult the mixer’s manual for detailed instructions․

Understanding the Mixer View
The Mixer View displays channels based on the selected layer, with a sidebar for quick access to key controls․ Customize the layout to enhance your workflow efficiency․
3․1 Navigating the Mixer Interface
Navigating the mixer interface is intuitive, with channels displayed according to the selected layer․ Use the sidebar for quick access to essential controls and customize the layout to suit your workflow․Tabs and drop-down menus provide easy access to advanced features, while visual feedback ensures precise adjustments․ Familiarize yourself with the interface to streamline your mixing process and enhance productivity․
3․2 Customizing the Channel Layout
Customizing the channel layout allows you to organize your mixer interface according to your workflow needs․ Channels can be rearranged using drag-and-drop functionality, and custom labels or colors can be assigned for easy identification․ Additionally, channels can be grouped or hidden to simplify complex sessions․ This feature enhances efficiency by letting you focus on the most critical elements of your mix․ Save your custom layouts for quick recall during different projects or scenarios, ensuring a tailored mixing experience every time․

Connecting Devices
Connecting devices to your mixing station is straightforward․ For wired connections, use XLR or TRS cables to link audio sources to the mixer․ Wireless options like Wi-Fi or Bluetooth offer flexibility․ Ensure all devices are compatible and configured according to the manufacturer’s guidelines․ Proper setup ensures seamless integration and optimal performance․
4․1 Wired Connections for Audio Mixers
Wired connections are the backbone of reliable audio mixing․ Use XLR cables for balanced audio signals to minimize noise and interference․ TRS (Tip-Ring-Sleeve) cables are ideal for unbalanced connections․ Connect microphones, instruments, and external devices to the mixer’s inputs, ensuring secure tightening of XLR connectors․ Outputs should be linked to speakers or recording equipment․ Always match cable types to the device’s ports for optimal signal quality․ Regularly inspect cables for damage to prevent signal degradation․ Refer to your mixer’s manual for specific input/output configurations and compatibility․
4․2 Wireless Connection Setup
Setting up wireless connections for your mixing station enhances flexibility and reduces cable clutter․ Start by enabling wireless mode on your mixer and compatible devices․ Use Wi-Fi or Bluetooth for reliable connections․ Ensure devices are on the same network and within range․ Pair MIDI controllers or wireless microphones by following the mixer’s pairing protocol․ For stability, use a dedicated network and avoid interference from other devices․ Regularly update firmware for optimal performance․ Consult your mixer’s manual for specific pairing instructions and troubleshooting wireless connectivity issues․

MIDI Configuration
MIDI configuration enables seamless communication between your mixer and controllers․ Assign MIDI channels, map controls, and sync devices for precise automation․ Refer to your mixer’s manual for specific setup instructions and troubleshooting common MIDI issues to ensure optimal performance․
5․1 Assigning MIDI Controllers
Assigning MIDI controllers allows precise control over your mixer’s functions․ Connect your MIDI device physically or wirelessly, then open the MIDI setup in your mixing station app․ Select your controller from the available devices and map its controls to the mixer’s channels, faders, or effects․ Ensure your mixer is in MIDI learn mode for automatic or manual mapping․ Verify connectivity by testing each control․ Refer to your controller’s manual for specific instructions․ Proper assignment ensures seamless integration and enhanced mixing efficiency․ Troubleshoot by checking MIDI ports, cable connections, or firmware updates if issues arise․
5․2 Syncing MIDI with Mixing Station
Syncing MIDI with your mixing station ensures seamless communication between your MIDI controller and the mixer․ Connect your MIDI device physically or wirelessly, then access the MIDI settings in your mixing station app․ Enable MIDI learn mode to automatically map controls or manually assign MIDI channels to specific mixer functions․ Test the connection by sending MIDI messages to ensure proper synchronization․ Refer to your MIDI controller’s manual for troubleshooting tips, such as checking MIDI ports, cable connections, or firmware updates․ Proper syncing enhances your mixing experience and workflow efficiency․

Network Configuration
Network configuration ensures reliable communication between devices․ Set up a dedicated network for your mixing station, following manufacturer guidelines․ Consult the manual for detailed setup instructions and troubleshooting tips․
6․1 Setting Up a Dedicated Network
To ensure reliable communication, set up a dedicated network for your mixing station․ Connect the mixer and control devices to the same network․ Use Ethernet for stability or Wi-Fi for flexibility․ Ensure all devices are on the same subnet․ Assign static IP addresses or use DHCP․ Refer to your mixer’s manual for specific network requirements․ Verify connectivity by pinging devices․ Update firmware if necessary․ A dedicated network minimizes interference and ensures smooth operation of your mixing station․
6․2 Troubleshooting Network Issues
If network issues arise, start by power cycling the mixer and connected devices․ Ensure all physical connections are secure and cables are undamaged․ Restart your router and verify that all devices are connected to the same network․ Check IP addresses and subnet masks for consistency․ Use diagnostic tools like ping to test connectivity․ If issues persist, consult the mixer’s manual or contact support․ Regularly updating firmware and drivers can also resolve connectivity problems․ A stable network is crucial for optimal mixing station performance․

Mixing and Automation
Master your audio with essential mixing techniques and automation tools․ Learn to balance levels, EQ, and effects while automating faders and mutes for dynamic live or studio mixes․
7․1 Basic Mixing Techniques
Mastering basic mixing techniques is essential for achieving a polished sound․ Start by setting optimal levels, ensuring no track overwhelms the mix․ Use EQ to enhance clarity, boosting highs for brightness and cutting lows to reduce muddiness․ Apply compression to control dynamics and maintain consistent levels․ Add depth with reverb and delay effects․ Balance panning to create a wide stereo image․ Automate faders and mutes to enhance transitions and highlight key elements․ These foundational techniques will help you craft a cohesive and professional mix, whether in a studio or live setting․
7․2 Automating Mixer Functions
Automating mixer functions enhances your mixing process by allowing dynamic control over levels, panning, and effects․ Use MIDI controllers to assign and sync automation parameters, ensuring smooth transitions during live or studio mixing․ Set up automation layers in your DAW or mixer software to record and edit fader movements․ For complex mixes, automate EQ adjustments and compressor thresholds to maintain consistency․ Utilize scenes or snapshots for seamless switching between different mix configurations․ Regularly review and refine your automation to ensure precision and clarity, elevating your mixes to professional standards․
Maintenance and Updates
Regularly clean controls and ports to prevent wear․ Update firmware and software for optimal performance and new features․ Check the manufacturer’s site or app for updates․
8․1 Regular Maintenance Tips
Regular maintenance ensures optimal performance and longevity of your mixing station; Clean all controls and ports to prevent dust buildup․ Inspect cables for wear and tear, replacing any damaged ones․ Lubricate moving parts if necessary․ Check firmware updates from the manufacturer’s website or app․ For models like the EZG9 MIXER or MS-100, follow specific guidelines․ Refer to your mixer’s manual for detailed procedures․ Schedule routine checks to avoid unexpected downtime and maintain precise mixing results․ Consistent upkeep ensures reliability and accuracy in your mixing operations․
8․2 Updating Firmware and Software
Regularly updating your mixing station’s firmware and software ensures optimal performance and access to new features․ Check the manufacturer’s website for the latest firmware versions, such as those for X32/M32(R) or XAir models․ Download updates using a computer or USB drive, following the manual’s specific instructions․ After installation, restart your mixer to apply changes․ Verify successful updates in the system settings․ For detailed steps, refer to your mixer’s manual or app resources, such as the Mixing Station Pro manual or manufacturer-specific guides․

Safety Precautions
Ensure electrical safety by avoiding water exposure and using grounded outlets․ Follow manufacturer guidelines for operation and maintenance to prevent accidents and ensure reliable performance always․
Wear protective gear and keep the area clear of flammable materials․ Regular inspections prevent hazards and maintain optimal function․
9․1 Electrical Safety Guidelines
Always ensure your mixing station is connected to a grounded electrical outlet to prevent shock․ Avoid exposing the unit to water or moisture, as this can cause electrical hazards․ Regularly inspect cords and connectors for damage․ Never overload circuits or use faulty wiring․ Keep the area clear of flammable materials and follow manufacturer guidelines for safe operation․ Disconnect power during maintenance or when not in use to minimize risks․ Adhere to local electrical codes and safety standards to ensure a safe working environment․
9․2 Chemical Safety for Industrial Mixers
When handling chemicals with industrial mixers, always wear protective gear, including gloves, goggles, and a face mask․ Ensure proper ventilation in the workspace to prevent inhalation of fumes․ Follow the manufacturer’s guidelines for chemical ratios and mixing speeds to avoid hazardous reactions․ Store chemicals in labeled, sealed containers away from heat sources․ In case of spills, contain the area and use appropriate neutralizing agents․ Regularly train staff on emergency procedures and maintain safety data sheets for all chemicals used․ Adhere to local regulations and safety protocols to minimize risks․
The Mixing Station Manual is your essential guide to mastering the operation, maintenance, and troubleshooting of your mixer․ By following the detailed instructions and safety guidelines outlined in this manual, you can ensure optimal performance and longevity of your equipment․ Whether you’re a seasoned professional or a newcomer, this manual empowers you to unlock the full potential of your mixing station․ Refer to the manual regularly for updates and best practices, and explore the community forums for additional support․ Happy mixing!