
The Honeywell T4 Pro Thermostat is a programmable, energy-efficient solution designed for seamless integration with various HVAC systems.
It offers advanced features like geofencing and smart home compatibility, ensuring optimal temperature control and energy savings.
With a user-friendly interface and robust scheduling options, it’s ideal for homeowners seeking convenience and efficiency.
The T4 Pro is backed by Honeywell’s reliable support, including detailed installation manuals and technical assistance, making it a trusted choice for modern heating and cooling needs.
1.1 Overview of the T4 Pro Model
The Honeywell T4 Pro Thermostat is a programmable, energy-efficient device designed for seamless HVAC system control.
Featuring a sleek design and user-friendly interface, it offers advanced scheduling options and smart home compatibility.
With geofencing capabilities and energy-saving modes, it ensures optimal temperature management and reduced energy consumption.
The T4 Pro is supported by comprehensive installation guides, including the Honeywell T4 Pro Installation Manual PDF, ensuring easy setup and configuration.
1.2 Key Features and Benefits
The Honeywell T4 Pro Thermostat offers programmable scheduling, energy-saving modes, and smart home integration through geofencing.
Its user-friendly interface ensures easy temperature adjustments and optimal comfort control.
With compatibility across various HVAC systems, it provides reliable performance and efficiency.
The T4 Pro also includes advanced features like remote access and energy usage tracking, enhancing its functionality and user convenience.

System Requirements and Compatibility
The Honeywell T4 Pro Thermostat is compatible with most HVAC systems, including gas furnaces and heat pumps, requiring a 24V power supply and proper wiring connections.
2.1 Compatible HVAC Systems
The Honeywell T4 Pro Thermostat is compatible with a wide range of HVAC systems, including gas furnaces, heat pumps, and air conditioning units. It supports single-stage, multi-stage, and dual-fuel systems, ensuring versatility for various home setups. Proper system compatibility is essential for optimal performance and energy efficiency, as outlined in the installation manual. Always verify HVAC specifications before installation.
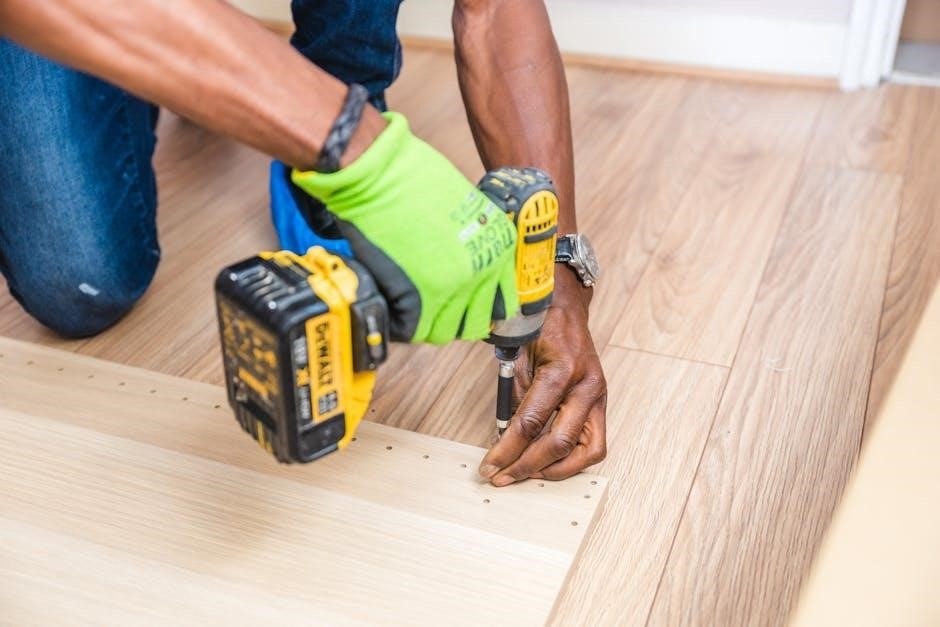
2.2 Necessary Tools and Materials
For a successful installation, gather essential tools and materials, including a screwdriver, wire stripper, and voltage tester. Ensure you have the thermostat unit, mounting screws, and any required wall anchors. A C wire may be needed for power, depending on your system. Refer to the installation manual for a complete list of materials to ensure a smooth setup process.

Step-by-Step Installation Process
Begin by turning off power to your HVAC system. Remove the old thermostat, then prepare the wall and mount the T4 Pro. Wire the device carefully, following the manual’s instructions, and power it up to test functionality before finalizing the setup.
3.1 Pre-Installation Checks
Before installing the Honeywell T4 Pro, ensure the system is compatible with your HVAC setup. Verify the wiring configuration matches the thermostat’s requirements. Check for a C-wire if necessary, as it powers smart features. Turn off the power at the circuit breaker and confirm the thermostat’s voltage matches your system. Review the installation manual to ensure all tools and materials are ready. This preparation ensures a smooth and safe installation process.
3.2 Mounting the Thermostat
Ensure the wall is level before attaching the mounting plate. Secure the plate using the provided screws. Align the thermostat with the plate and gently press until it clicks into place. Check the display to confirm proper installation. Ensure all wires are neatly secured behind the thermostat for a clean finish.
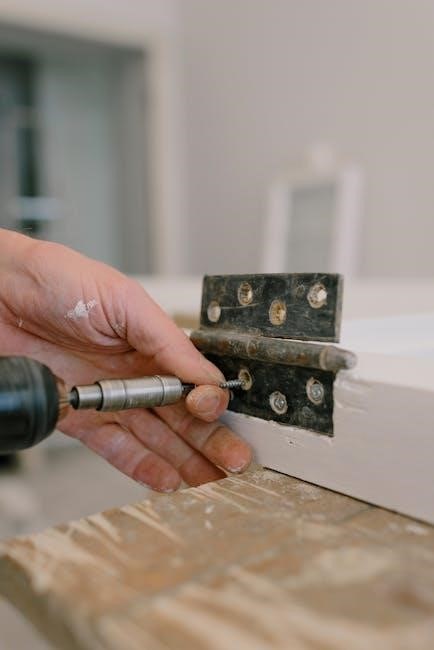
3.3 Wiring the T4 Pro Thermostat
Connect the wires to the appropriate terminals on the thermostat, following the labels (e.g., R, W, Y, G, C, etc.). Ensure the HVAC system is powered off before proceeding. Refer to the installation manual for specific wiring diagrams. Secure any excess wire neatly behind the thermostat. For smart models, verify the C wire connection if required. Double-check all connections before powering on the system.
Powering Up and Initial Testing
After wiring, turn on the power to the HVAC system. Check the thermostat screen to ensure it powers up and displays the home screen.
Verify basic functions like temperature adjustment and scheduling to confirm proper operation before proceeding with configuration.
4.1 Turning On the Thermostat
After completing the installation, restore power to the HVAC system and ensure the thermostat is properly connected.
Check the thermostat screen to confirm it powers on and displays the home screen without error messages.
If the screen remains blank, verify the C-wire connection and ensure the circuit breaker is in the “on” position.
Once powered up, test basic functions like adjusting the temperature to ensure proper operation.
4.2 Testing Basic Functions
After powering on, test the thermostat by adjusting the temperature to ensure the HVAC system responds correctly.
Verify heating and cooling stages are operational and transitions are smooth.
Check the schedule settings to confirm they activate as programmed.
Test manual overrides to ensure temporary adjustments work properly.
Review the screen for error messages and ensure all functions are responsive.
This step confirms the thermostat is installed correctly and functioning as intended.
Configuring the System
Configure the Honeywell T4 Pro by setting up schedules, adjusting temperature ranges, and enabling features like geofencing for smart energy management.
5.1 Setting Up the Schedule
The Honeywell T4 Pro allows you to create a custom schedule with up to seven days of programming.
Set temperature preferences for different times of the day, ensuring energy efficiency and comfort.
Use the touchscreen interface to adjust start and end times, and select temperature ranges for heating and cooling modes.
Ensure the schedule aligns with your daily routine and lifestyle for optimal performance and energy savings.
Remember to save your settings after configuring to maintain your preferred schedule.
5.2 Adjusting Temperature Settings
Adjust temperature settings on the Honeywell T4 Pro by navigating to the temperature control menu.
Use the touchscreen to increase or decrease the setpoint temperature for both heating and cooling modes.
Set different temperatures for various times of the day to optimize energy usage and comfort.
Ensure the temperature range aligns with your HVAC system’s capabilities for proper operation.
Test the temperature adjustments to confirm the system responds accurately to the new settings.

Advanced Features and Settings
The Honeywell T4 Pro offers sophisticated features like geofencing, smart home integration, and energy-saving modes, enhancing comfort and efficiency.
6.1 Geofencing and Smart Home Integration
The Honeywell T4 Pro supports geofencing, allowing automated temperature adjustments based on your location. It seamlessly integrates with smart home systems like Amazon Alexa and Google Home. Use the Resideo app to enable geofencing, ensuring energy savings when you’re away and comfort upon return. This feature enhances efficiency and convenience, making it a standout in smart thermostat technology.
6.2 Energy-Saving Modes
The Honeywell T4 Pro offers energy-saving modes that optimize heating and cooling usage. Features like automatic temperature adjustments and smart recovery ensure efficient operation. The thermostat learns your system’s efficiency to minimize energy waste. Energy usage reports via the Resideo app provide insights to further reduce consumption. These modes are compatible with smart home systems, enhancing overall energy efficiency and lowering utility bills while maintaining comfort.
Troubleshooting Common Issues
Troubleshooting the Honeywell T4 Pro involves diagnosing issues like blank screens or incorrect temperature readings. Check power sources, wiring, and system compatibility to resolve common problems efficiently.
7.1 Blank Screen or No Power
A blank screen or no power on the Honeywell T4 Pro Thermostat can occur due to battery depletion or electrical issues. First, check the circuit breaker or fuse box to ensure power is restored. If using a battery-powered model, replace the batteries with fresh ones. For wired models, verify the C wire connection and consult the installation manual for troubleshooting steps to resolve the issue quickly and effectively.
7.2 Incorrect Temperature Readings
Incorrect temperature readings on the Honeywell T4 Pro Thermostat can occur due to improper sensor calibration or placement. Ensure the thermostat is mounted away from direct sunlight, drafts, or heat sources. Check the sensor accuracy by comparing it with a separate thermometer. If issues persist, recalibrate the sensor through the thermostat’s menu or refer to the installation manual for detailed calibration instructions to ensure accurate temperature control and reliable performance.

Maintenance and Upkeep
Regularly clean the thermostat to ensure accurate temperature readings and smooth operation. Check and replace batteries as needed, and perform firmware updates to maintain optimal performance.
8.1 Cleaning the Thermostat
Cleaning the Honeywell T4 Pro Thermostat is essential for maintaining accuracy and functionality. Use a soft, dry cloth to gently wipe the display and remove dust or debris.
Avoid harsh chemicals or liquids, as they may damage the screen or internal components. Regular cleaning ensures reliable temperature readings and smooth operation.
8.2 Firmware Updates
Regular firmware updates ensure the Honeywell T4 Pro Thermostat operates with the latest features and improvements. Check for updates through the Honeywell app or website.
Connect the thermostat to Wi-Fi for automatic updates. Never interrupt an update to avoid system issues. If problems occur, restart the device or contact customer support for assistance.
Manufacturer Resources and Support
Honeywell provides comprehensive resources, including the T4 Pro installation manual PDF and dedicated customer service for technical assistance and troubleshooting.
9.1 Accessing the Installation Manual PDF
The Honeywell T4 Pro installation manual PDF is readily available on Honeywell’s official website. Simply navigate to their support section and search for the T4 Pro model. Ensure to download the correct version compatible with your system. If you encounter issues, contact Honeywell’s customer service or refer to the provided links for direct access. This guide provides detailed step-by-step instructions for a smooth installation process.
9.2 Customer Service and Technical Assistance
Honeywell offers comprehensive customer support for the T4 Pro thermostat. Technical assistance is available through their website, including live chat, email, and phone support.
Trained representatives can address installation issues, troubleshooting, and software updates. Additionally, Honeywell provides an extensive resource library with FAQs and user forums for self-assisted solutions.
This ensures users can resolve any concerns efficiently, maintaining optimal thermostat performance.
After completing the installation, ensure all systems function properly and settings are optimized for performance. Refer to the manual for any final adjustments or missed steps.
10.1 Verifying Proper Installation
After installation, turn on the thermostat and check the display for proper functionality. Test heating and cooling modes to ensure correct operation. Verify the schedule is active and adjust settings if needed. Check all wiring connections for accuracy and consult the manual if issues arise. Ensure no error messages appear, confirming a successful setup.
10.2 Ensuring Optimal Performance
Regularly clean the thermostat and ensure accurate temperature readings. Check and update schedules to match your lifestyle for energy efficiency. Verify firmware is up-to-date and settings align with your HVAC system. Review the installation manual for maintenance tips and adjustments. Ensure proper wiring connections and system compatibility for uninterrupted operation. Schedule periodic checks to maintain performance and efficiency over time.